COBI.time Installation
Table of Contents
Requirements
- Node.js Version 24.11.0
- Microsoft IIS (WebServer)
- SAP Business One ServiceLayer
- SAP Business One 10 Patchlevel 2
Installation
NODE.js Installation
Download the NODE.js LTS Version (See link in Requirements) and install it. Do not alter any values in the installation process. Just install it in the default way.
IIS Installation
If Microsoft IIS is already installed you this Installation Guide may not be applicable for you. Just make sure the dynamic compression is installed for Microsoft IIS.
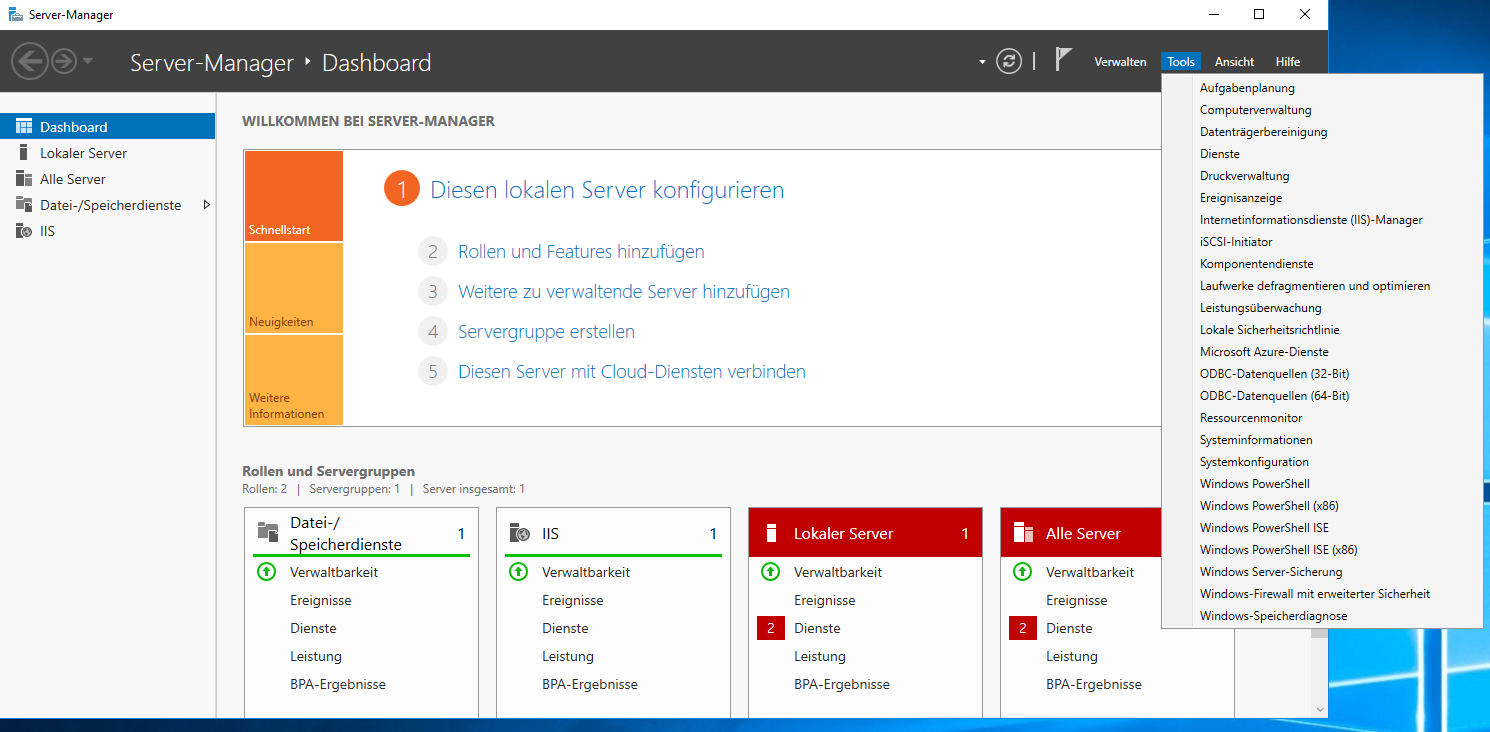
Make sure Microsoft IIS is not installed:
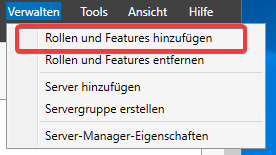
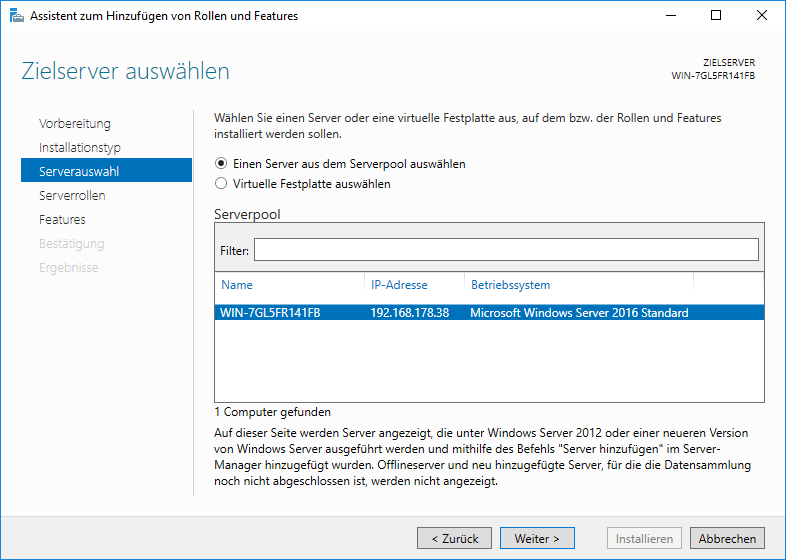
If not, install Microsoft IIS:
Picture 1: Add Roles or Features
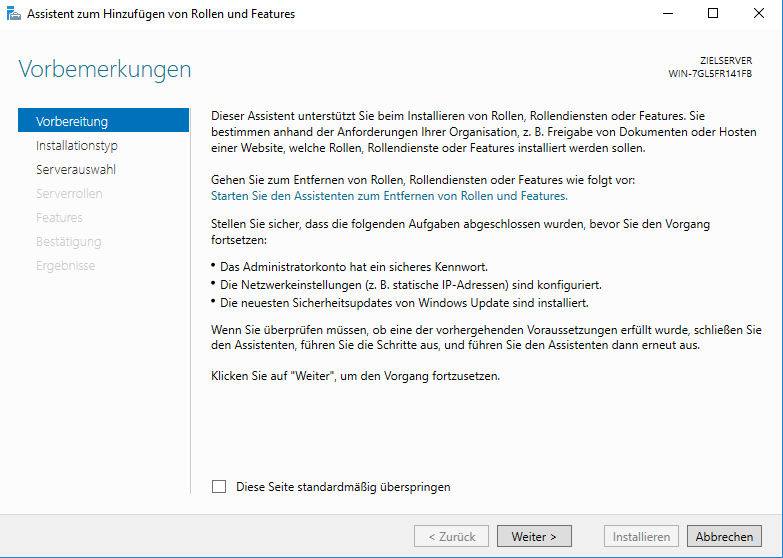
Press Next:
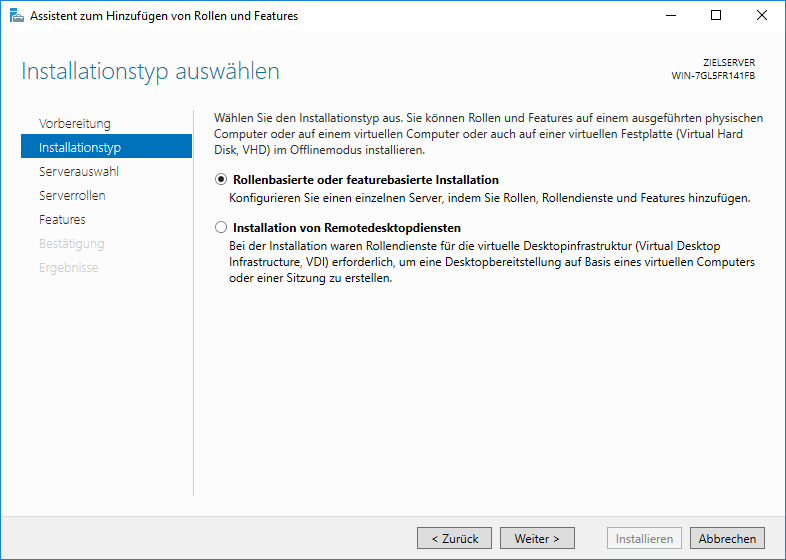
Press Next:
Press Next:
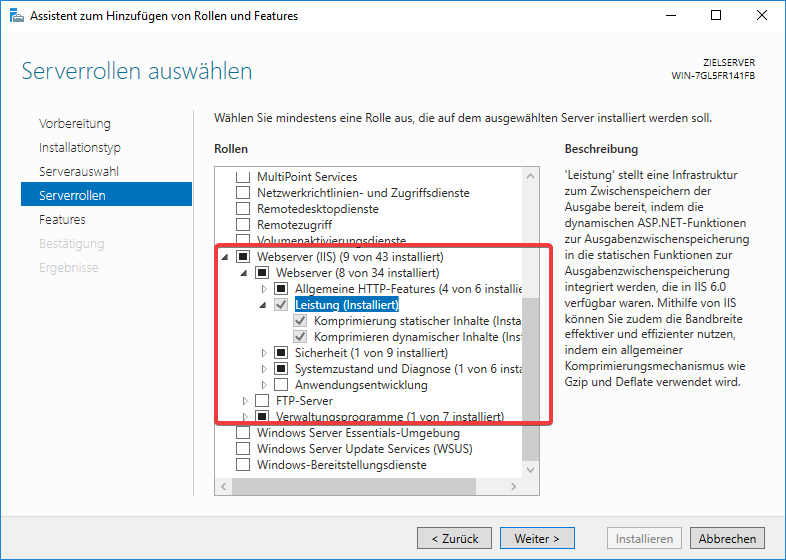
Install Webserver IIS with standard Features (just click on Webserver) but also add under Performance: Dynamic Compression:
Press next untill you get install. Then Install the Features. You normally don’t need to restart the computer.
IIS Module URL Rewrite Installation
Install the URL Rewrite from the requirements after you have installed IIS successfully:
COBI.time Installation
Install COBI.time via the Installation File which you get from us. COBI.time then gets installed to the standard folder: C:\Program Files (x86)\COBI.time\
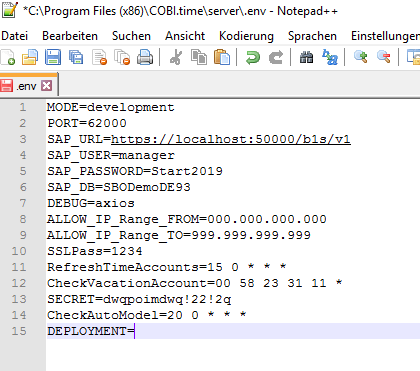
Navigate to that folder and then edit the .env file with Notepad. (Make sure you have administrator rights. Otherwise start notepad as admin and then open the .env from Open File context):
MODE=production (production or development – put it in production to minimize logs)
PORT=62000 (specify any port here for COBI.time Backend)
SAP_URL=https://localhost:50000/b1s/v1 (ServiceLayer URL – Replace Localhost with ServiceLayerIP)
SAP_USER=manager (SAP User with indirect Access License or higher)
SAP_PASSWORD=**** (SAP User Password)
SAP_DB=SBODemoDE93 (SAP Database Name)
SSLPass=1234 (Password for custom SSL Certificate. Leave 1234 if you don’t provide with an extra SSL Certificate)
SECRET=iosncaonmwdo1! (Change to any random string for authorization token encryption)
Don’t change any other fields!
You have the possibility to change the SSL Certificate if you want to host COBI.time outside of your internal network and specify a domain. In C:\Program Files (x86)\COBI.time\server\certs replace the cert.pem with the certificate and the key.pem with the private password protected key. Change the SSLPass accordingly.
COBI.time Service Installation
Open Powershell as Administrator and navigate to: C:\Program Files (x86)\COBI.time\server
Install a global NPM Package for Microsoft service creation with the command (Make sure NODE.JS LTS Version is installed. After new NODE.JS Installation restart powershell):
npm i -g qckwinsvc2
After that use that new package to install a COBI.time Microsoft Service. Make sure all values in the command are correct:
qckwinsvc2 install name="COBI-time" description="COBI.time Backend Server" path="C:\Program Files (x86)\COBI.time\server\server.js" args="-a -c" now
If you install COBI.time to a different folder change the command accordingly.
If you get an Powershell Execution Policy Error execute this Command beforehand:
Set-ExecutionPolicy RemoteSigned
IIS Configuration
Open IIS-Manager:
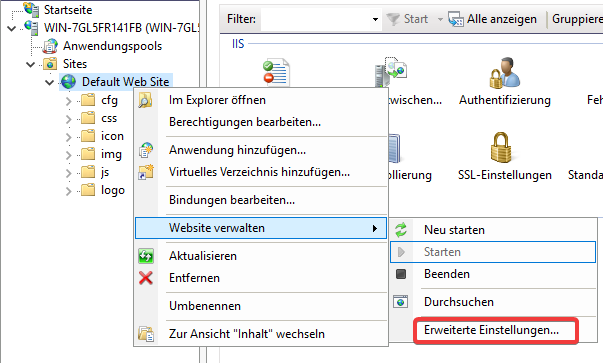
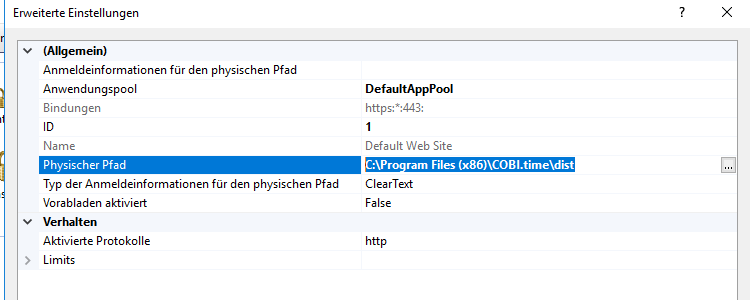
Change the default Website to COBI.time Folder:
Change the Physical Path Property to: C:\Program Files (x86)\COBI.time\dist
Open Server Certificates and add COBI.time Servercertificate to it:
Right Click → Import
Select the .pfx from C:\Program Files (x86)\COBI.time\server\certs\cobitime.pfx (Or use your own Certificate). The default Password is 1234.
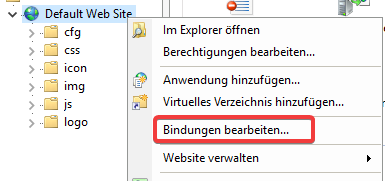
Edit the Default Web Site Binding Settings:
Remove http from the list and add only https to it. Select the SSL Certificate which you just imported:
Important: SNI (Server Name Indication) must be ticked!
After this Step the COBI.time Website should be up and running under: https://serverNameHere or https://localIpAddressHere.
COBI.time Setup Website Backend Connection
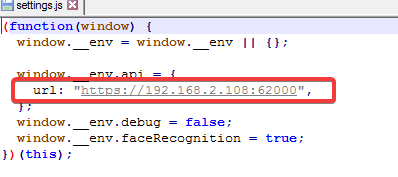
Navigate to: C:\Program Files (x86)\COBI.time\dist\cfg and edit the settings.js file:
Change the URL to the Backend IP Address + Port which you specified in the .env File.
COBI.time Database Setup
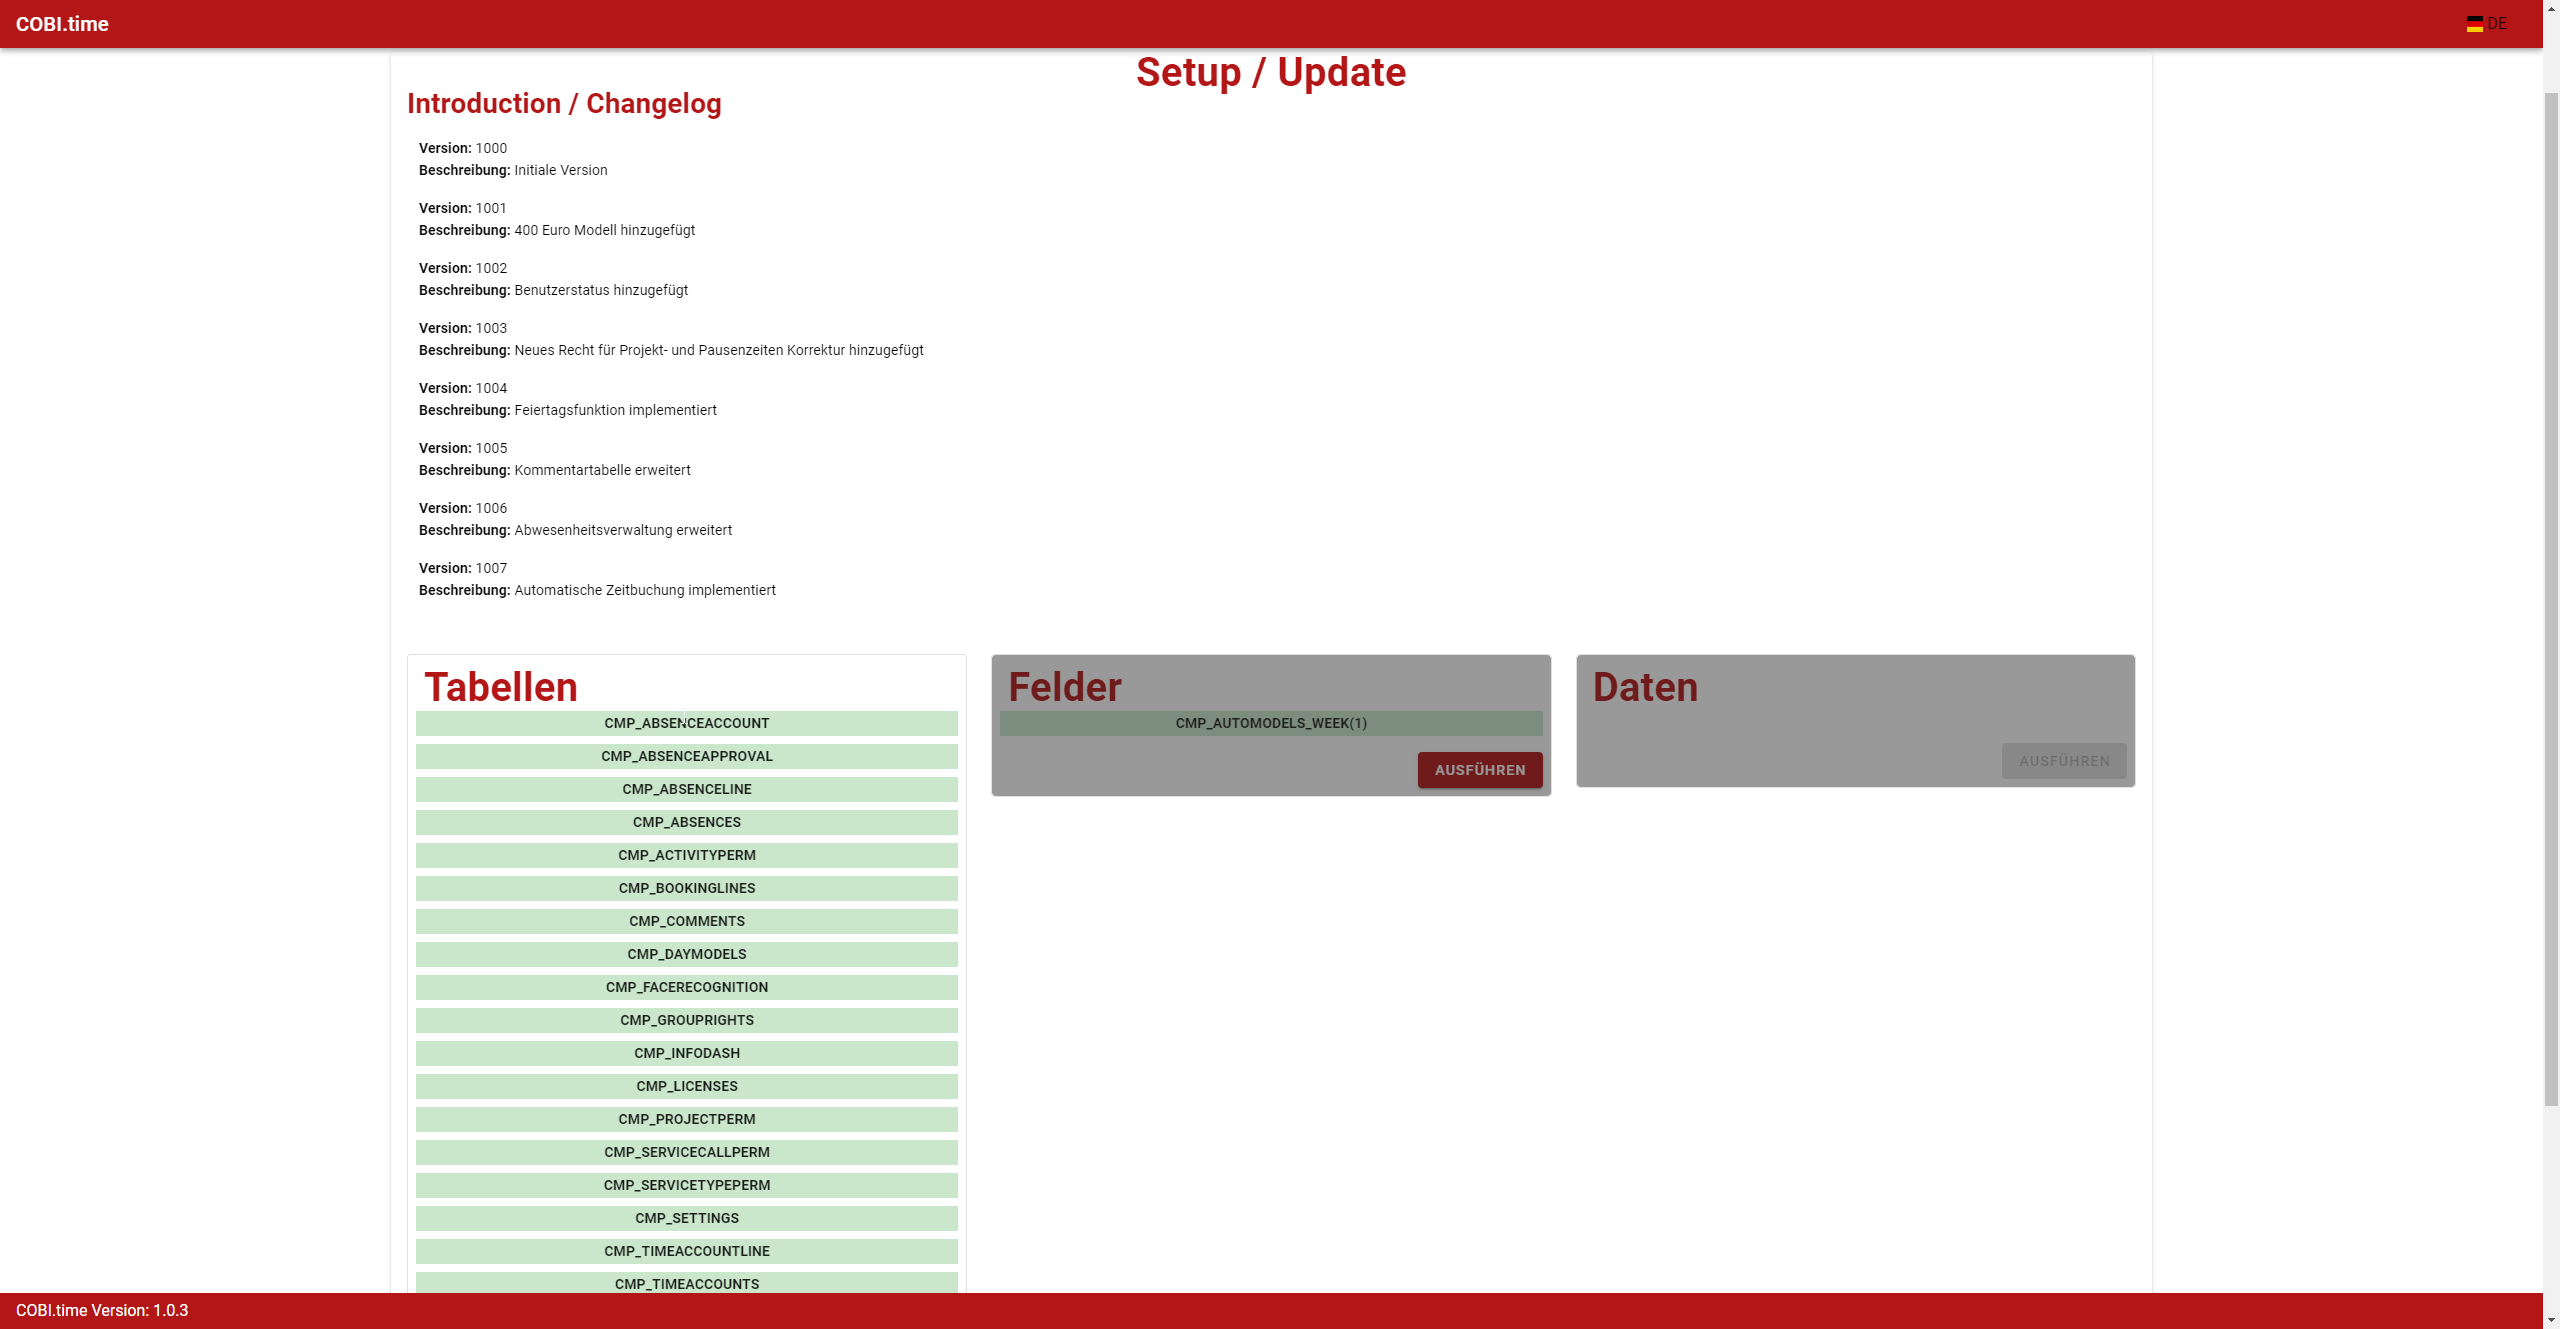
Warning: COBI.time will alter the SAP Database. Make sure every User is logged out from SAP before doing this Step Make sure the previously installed service is running. Navigate to COBI.time Website: https://localhost/Setup
This site should display a changelog and every table COBI.time wants to create:
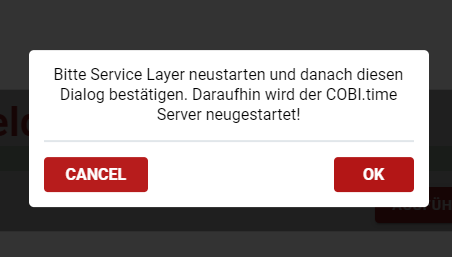
Click on execute and wait until all tables have been created. COBI.time then asks you to restart the Service Layer.
After you have restarted the Service Layer click ok:
The Website will reload and you can now create the fields for the tables. After that it asks you to restart the service layer one more time. After restarting press on OK. The Website again should reload. After it has reloaded press execute one more time for the COBI.time initial data. Once it is done you can just press ok and the website will reload and you should be taken to the login page. If the automatic transfer to the login page does not work, just navigate to it manually: https://localhost/Login
You have successfully installed COBI.time. You can now login as Administrator with:
Username: admin
Password: admin
Make sure to change that password. If you have further questions regarding COBI.time usage is answered in the COBI.time manual.
PIN Activation (optional)
To enable PIN entry in COBI.time, an activation password is required.
Prerequisite (Server):
On the server, a password must be defined in the .env file (activation password).
This password is not stored in COBI.time itself but is only used once to activate the PIN function on the device.
Content example:
- .env
PinLoginPassword=test
Uninstallation
Remove COBI.time Service
Use the following command to uninstall the COBI.time Service:
qckwinsvc --uninstall --name "COBI-time"
After that you can just remove the COBI.time installation from your computer.
